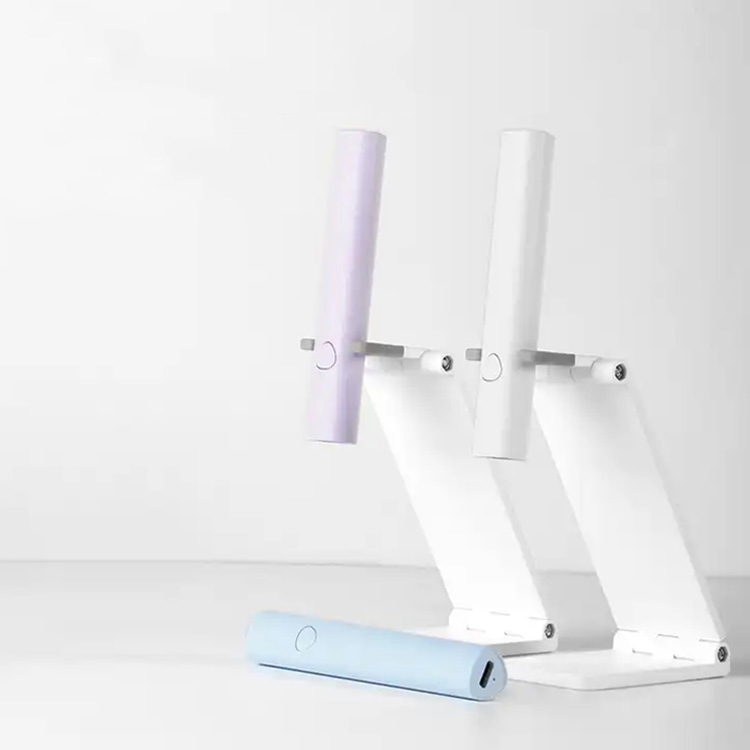
WELCOME TO INQUIRE US Tel:+86 17521172723 or sales02@yvnail.com

HomeProductsNail LampCordless Mini UV Nail Lamp Handheld 2-in-1
Rechargeable Mini Flash Cure UV Nail Lamp Handheld Manufacturer
Adhesive Nail Rhinestone Glue Gel Nail Manufacturer
Rechargeable Mini Flash Cure UV Nail Lamp Handheld Manufacturer
Adhesive Nail Rhinestone Glue Gel Nail Manufacturer

Cordless Mini UV Nail Lamp Handheld 2-in-1

Minimum order quantity: 1 pieces.

Type Mini UV Lamp Handheld
Power 3W
Timer
60s
Light source
365nm+ 405nm LEDs
dimension
110.8*16.38MM
Feature
Cordless Rechargeable
Application
LED Gel Fast Curing
 
 
Customization:
Customized logo(Min. order 100 pieces)
Customized packaging(Min. order 300 pieces)
To Be Your First Beauty Supply Station
Product Description
  1. Portable Design: The compact size of the 3w mini nail lamp makes it highly portable, allowing you to use it at home, in a salon, or even when traveling.
  2. Rechargeable: It comes with a built-in battery, making it cordless and convenient to use anywhere without the need for a power outlet. This feature also reduces the environmental impact by eliminating the need for disposable batteries.
  3. Handheld with Stand: The unique design combines the convenience of a handheld device with the stability of a stand. You can hold it in your hand for easy access to your nails or place it on a surface for hands-free operation.
  4. Dual Function: The lamp serves a dual purpose as both a nail drying lamp and a stand, providing two functions in one compact device.
  5. LED Technology: Equipped with LED lights, which are known for their energy efficiency and long lifespan, the nail lamp provides a consistent and even light for optimal nail curing.
  6. Fast Curing Time: The 3w (wattage) might indicate that it has a powerful yet quick-acting curing time for UV/LED gel polishes, ensuring your manicure dries quickly and efficiently.
  7. Easy to Use: With simple controls, the device is user-friendly, allowing for effortless operation even for beginners.
  8. Versatile: Suitable for use with various types of UV/LED gel polishes, making it a versatile tool for different nail treatments and designs.
  9. Safety Features: Built-in safety features protect users from excessive exposure to UV/LED light, ensuring a safe experience during use.
  10. Charging Indicator: Some models may include an indicator to let you know when the device needs to be charged, so you're never caught off guard without a working lamp.

Get in touch with us

Enter specific requirements(such as product specifications and demand etc. ) to receive an accurate quote.

Related Products

  • How to prevent nail damage with nail drill?

    Using an electric nail drill is not difficult, but you should learn how to use it properly. Use a proven brand with high power and good quality carbide, sintered carbides, and diamond nail drill bits that will not cause jerking. Poor quality bits will push you to use force and work at a higher speed, which may result in too invasive work. When removing the hybrid, do not remove it up to the natural nail plate. there should be a small layer that you can remove quickly by soaking off. Make sure to use the correct bit for the specific activity.

  • Why you need 5-in-1 Nail Drill Bits?

    1. It has three coarseness of grits and five functions. 2. Seven sizes to choose from, to meet various use habits. 3. It has two rotate directions 4. It fits well with most nail drills 5. Professional nail drill bits with high-quality materials

  • Four Nail Bits and their Uses in Nail Services?

    1. Cuticle Cleaner Safety Bit Cuticle cleaner bits are perfect for cleaning and preparing cuticle areas, as it can avoid lifting on nail beds even when used in a hurry or in the peak working time. It prepares the cuticle area without damaging the client's nails, so acrylic, gel or dip powder will last longer. 2. Under the Nail Cleaning(UNC)/Needle Bit The UNC bit is under the nail cleaning bit. The shape of the UNC bit is pointed and small and this particular shape helps the bit to get in tight spaces. The UNC bit is commonly used not only for under the nail cleaning but also for sidewalls. Some nail technicians also use this bit for making designer holes in the nails. 3. Barrel/Cylinder bit The barrel bits are great for doing surface work on the nail. You can also use the barrel bits for backfill cutting, shortening, and shaping the nail, and to make a smile line. But make sure you don’t use this bit in the cuticle area. 4. Mandrel Bit The mandrel bit is commonly made of rubber or metal. You can only use it after slipping it into the sanding band. This nail bit helps shape the nail and do surface work very well, but remember don’t use it too long on your clients’ nails because sanding bands tend to heat very quickly while using.

  • How to prepare a New Acrylic Brush?

    1. Remove the Plastic Cap 2. Break the Glue Seal 3. Create the Pinch Point 4. Storing your Brush

  • The Benefits Of UV And LED Nail Lamps?

    1. Faster Drying Time 2. Long-Lasting Polish 3. No Need For Air-Drying 4. Healthier Nails

  • How To Choose The Best Nail Shape For Your Fingers

    1. Best Nail Shape For Long And Wide Fingers: Almond/Oval; 2. Best Nail Shape For Long And Slim Fingers: Square/Squoval; 3. Best Nail Shape For Short And Wide Fingers: Almond and Oval/Round/Coffin/Ballerina or Stiletto; 4. Best Nail Shape For Short And Slim Fingers: Almond and oval/Round/Squoval; 5. Best Nail Shape For Fat Fingers: Oval/round/squoval; 6. Best Nail Shape For Big Hands: Flare shaped nails/oval/lipstick/edge. 7. Best Nail Shape For Chubby Fingers: Oval/round/almond/coffin;

  • How to Remove Dry Acrylic from your Acrylic Kolinsky Brush?

    1. Fill a clean monomer dish that does not contain any other chemicals or solution contaminants with our Brush Cleaner and submerge the bristles, then take a cuticle pusher or orange stick and gently push the dried acrylic out. Only fill your clean monomer dish with enough solution to just cover the submerged brush bristles. If you use too much you could damage the metal section (the ferrule part) that holds the bristles to the handle.  2. Swish the bristles around in the solution for 2 minutes, make sure you are using gentle back and forth motions instead of vigorous twisting. 3. Take an Orange stick or cuticle pusher and gently push the Acrylic out in the direction of the bristles. 4. Dip your Acrylic Brush into your liquid monomer to recondition the bristles and pinch to reshape your brush.

  • What to do if your Acrylic Brush Bristles are still hard?

    1. If the acrylic has sat inside the bristles for a couple of hours or overnight, you will need to soak the Acrylic Brush in the Brush Cleaner for 5 minutes. Then push the powder out with a cuticle pusher or orange stick in the direction of the bristles, if the powder will still not budge then leave to soak for a further 5 minute and repeat until the Acrylic Brush is residue free. 2. Dip your Acrylic Brush into your liquid monomer to recondition the bristles and pinch to reshape your brush.

  • How do I know what grit to get for my carbide bits?

    For gel manicures or enhancements, such as structured gel, builder gel, hard gel, gel-x extensions, poly gel, or a double layer of standard gel base coat, we recommend a medium grit. For acrylic and dip-powder enhacements, we recommend a coarse grit.

Contact us for accurate response